Soil Testing: Read Your Garden Before You Amend It
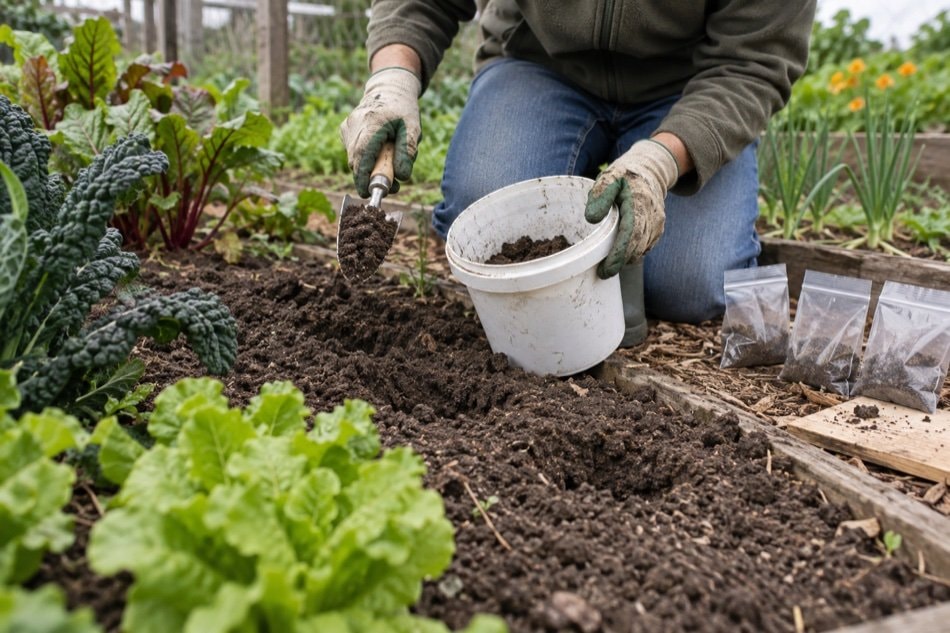
A soil test replaces guesswork with a baseline. It helps explain why a crop struggles, whether a planned bed needs adjustment and which additions the soil does not need.
What a Test Can Tell You
A standard garden soil report commonly describes pH and selected plant nutrients. Some services also report organic matter, soluble salts or texture-related measures. Results are most useful when paired with the crop you intend to grow, because an acceptable range for one planting may not suit another. A test is not a complete portrait of soil life or structure, but it is a strong starting point for decisions that would otherwise be guesses.
Test a new bed before making major amendments. Retest established ground on a consistent schedule, especially after a deliberate correction. Testing too soon after spreading compost, lime or fertilizer can produce a sample that reflects a concentrated addition rather than the bed as a whole.
Collect a Representative Sample
Choose a clean bucket and a clean hand trowel. Remove surface mulch, then take small slices of soil from several places across the bed at a consistent depth. Mix those subsamples thoroughly and use the amount requested by the testing service. Sampling only the best-looking corner or the exact spot where a plant failed can distort the result.
Keep areas with different histories separate. A vegetable bed, lawn, orchard row and recently filled raised bed should usually be sampled as different units. Likewise, isolate a visibly troubled patch if you want to compare it with healthy ground. Label each sample in a way that matches a simple garden map.
Read pH in Context
Soil pH affects how readily roots can access nutrients, but the number should not be chased without a reason. Compare the result with the preference of the plants going into that bed and follow the test service's recommendation for that specific soil. Texture and buffering capacity influence how a soil responds, so copying an amendment rate from another garden can overshoot.
Changes to pH take time and should be measured, mixed evenly and reassessed later. Avoid piling corrective materials in planting holes. A broad, gradual correction creates a more predictable root zone than scattered pockets with sharply different chemistry.
Respond to Nutrient Results Carefully
More fertility is not automatically better. Excess nutrients can interfere with plant balance or move beyond the root zone with water. Start with the report's crop-specific recommendation, account for compost and other additions already applied, and measure the bed area before calculating amounts. If a result or unit is unclear, ask the testing service to explain it.
Organic matter can improve water behavior and workability, but compost is not compositionally identical from batch to batch. Treat it as an amendment with real nutrients, not as limitless filler. Combine measured additions with surface mulch, minimal traffic on wet beds and roots growing through as much of the year as possible.
Connect the Report to the Garden
A test result becomes useful only after observation. Note leaf color, growth, yield, drainage, irrigation pattern and recent weather. Yellow leaves, for example, can result from root stress in saturated soil as well as nutrient shortage. Correct the physical problem before assuming the answer is another amendment.
Record the report and any action in a garden journal. Mark the sampling date and location, the material applied and its amount. Over several seasons, that record reveals whether the soil is moving steadily toward a useful range or being pushed back and forth by reactive changes.
A Simple Testing Routine
Divide the garden into management zones, collect mixed samples from each zone and submit them with the intended crops. When the report arrives, address only documented needs and continue the structure-building practices in the soil preparation guide. Retest after enough time has passed for the change to settle. The aim is not a perfect report; it is a stable, workable soil that supports healthy roots without unnecessary inputs.
A Small, Useful Trial
Sample two clearly labeled management areas separately: for example, the established vegetable bed and a new border. Sketch the sampling points, submit the same requested depth and compare the reports before applying anything. If the results differ, keep future amendments and records separate. This exercise shows why one sample for an entire property can hide meaningful variation.
When the reports return, place each one beside its sample map before comparing numbers. Highlight only the findings that call for action, copy the laboratory units exactly and note which crop recommendation applies to each bed. Measure the actual bed area before obtaining any amendment. File the report, map and action together, then set a realistic retest date so the next sample can show whether the measured change moved the soil in the intended direction.
Label Before You Sample
Write labels and draw the sampling map first. Once several similar bags are on the bench, memory is a poor filing system.